Getting up and running with Laravel using Homestead
Laravel Homestead is an official Vagrant box, providing the perfect environment for working locally
March 2019
Intro
Getting up and running with a great local environment can be challenging.
When working with Laravel, Homestead provides the perfect local environment, and one that can be shared between multiple machines and Operating Systems.
It uses Vagrant to provide:
"...a wonderful development environment without requiring you to install PHP, a web server, and any other server software on your local machine. No more worrying about messing up your operating system! Vagrant boxes are completely disposable. If something goes wrong, you can destroy and re-create the box in minutes!" - Homestead docs
cd /c/sitesI prefer the 'Per Project Installation' described in the docs rather than one global install as it allows other developers to get started with very little configuration.
I've seen many people having issues getting it set up, and have had some issues myself in the past. Hopefully this article can help.
Requirements before starting
There are a few required programs before getting started. If you are a developer, chances are you will have these already. If you do, go ahead and get the latest versions to make sure everything runs smoothly. If not, download and install these three programs:
- Vagrant This will allow us to use the Homestead box. Installation is a step-by-step process.
- Virtualbox This is the virtualisation software used with Vagrant. Vagrant works with other programs, but this is the most popular and is free. Installation is again a step-by-step process.
- Composer This is a dependency manager for PHP, allowing you to bring useful packages into a project. It will be used to install Homestead and Laravel. Follow the installation instructions for your system. When done, check that composer is installed correctly by typing 'composer --version' into your terminal. It will return the version you have installed.
Once these are installed (and you have restarted your machine if required), we are good to get going.
Installing Homestead
First things first, open your terminal and change directory to your sites/projects folder. In my case, that's: Next, create a new project folder using Composer. I'm naming it 'my-laravel-project':
composer create-project --prefer-dist laravel/laravel my-laravel-projectThis will create a new Laravel project in the folder specified. Lets change the directory to this new folder:
cd my-laravel-projectNext, use Composer to pull down the Homestead files into the project. This might take a few minutes depending on your connection speed. Like most processes in this article, the files will be cached and will speed up significantly on the next project install.
composer require laravel/homestead --devWhen this has finished, use the 'make' command. This will generate a 'Vagrantfile' and 'Homestead.yaml' file in the root directory, allowing us to configure the Homestead box before running it.
# Windows
vendor\\bin\\homestead make

# Mac / Linux
php vendor/bin/homestead make
If you want to change the local URL for development, you can change 'homestead.test' to whatever you like. When doing so, ensure your particular URL is added to your hosts file, rather than 'homestead.test' (this is explained later in the article).
After the Homestead file has been (optionally) configured, you can now spin up the Virtual Machine:
vagrant upAgain, this might take a while, and will likely be the longest part of this process. Once the box is downloaded to your system the first time, your machine can use it from memory so it will be much quicker in the future. Sit back, let it do its thing, or go grab a coffee ☕.
Quick side-note; if you get this error:
"Check your Homestead.yaml (or Homestead.json) file, the path to your private key does not exist."
Run the following in the terminal to create the file required (it will be empty, but just needs to exist - More info here:
touch ~/.ssh/id_rsaWhen the box has downloaded and started, you will need to add a hosts entry to your machine. This tells your machine to go to the IP address you provide when the relevant URL is hit.
Open the hosts file on your machine in your text editor.
On Windows, this is usually at: 'C:/Windows/System32/drivers/etc/hosts'
On Mac/Linux, this is at: '/etc/hosts'
Add a new entry at the bottom of this file. This will contain both the IP Address and URL, both of which were set in the Homestead file. It's very important that these match exactly what was added previously.
You may need to open your text-editor as an admin/superuser to save this file, depending on your setup.
192.168.10.10 homestead.testAfter saving, open your browser and go to 'http://homestead.test' (or the URL you have set in your Homestead and hosts files) and you will see the Laravel welcome page! 🎉
Please note: if making any changes to the 'Homestead.yaml' or 'Vagrantfile' after this point, the changes won't be reflected unless you provision the box. This command will reload the box and apply any changes made:
vagrant reload --provisionYou are now good to go!
To get access to the box and the features provided by Homestead, SSH into it, then change to the 'code' directory:
vagrant ssh
cd code
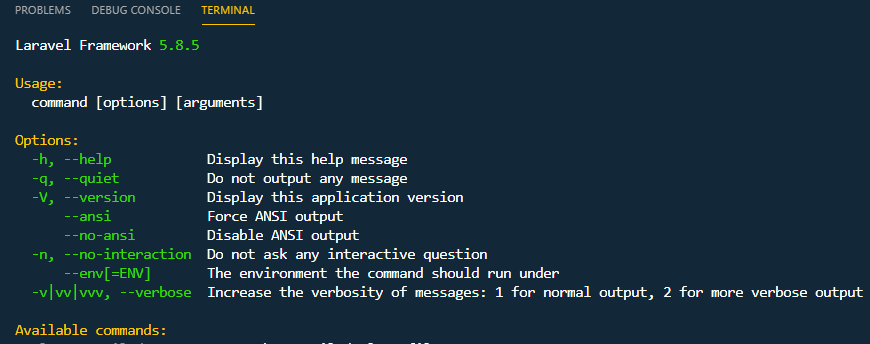
From here, you can run NPM, composer, git and more. You can also run Laravel commands with:
php artisanGit
Now is a perfect point to initialise the project as a git repository. Everything is set up, ready to go and untouched.
First, the '.env' file should be copied to '.env.example' for use by the other developers.
While we are at it, also add the '.vagrant' folder and 'Vagrantfile' to the '.gitignore' file as this shouldn't be added to the repository:
cp .env .env.example
git init
echo '.vagrant' >> .gitignore
echo 'Vagrantfile' >> .gitignore
git add .
git commit -m "Initial commit"
Connecting to the Homestead database
At some point, you will need to connect to the database. Use your MySQL program of choice with these credentials: Connect via SSH
- SSH hostname: 192.168.10.10
- SSH username: vagrant
- SSH password: vagrant
- MySQL hostname: 127.0.0.1
- MySQL server port: 3306
- Username: homestead
- Password: secret
Sharing with other developers
Once the initial commit has been pushed to a repository, it's very easy for other developers to get working locally on the project.
After cloning the project, you may notice that there is no '.env' file as it has been gitignored. There is however a '.env.example' file, which serves as a blueprint for the project's config. This should be renamed to '.env':
mv .env.example .envThey must then install vendor files and run the relevant 'make' command for the system being used. This will share and map the correct folders for Homestead to work. After that, run 'vagrant up' to start the VM:
composer install

# Windows
vendor\\bin\\homestead make

# Mac / Linux
php vendor/bin/homestead make

vagrant up
The final steps are to generate a unique 'APP_KEY' in the '.env' file and run database migrations. Laravel can help with this as usual:

